
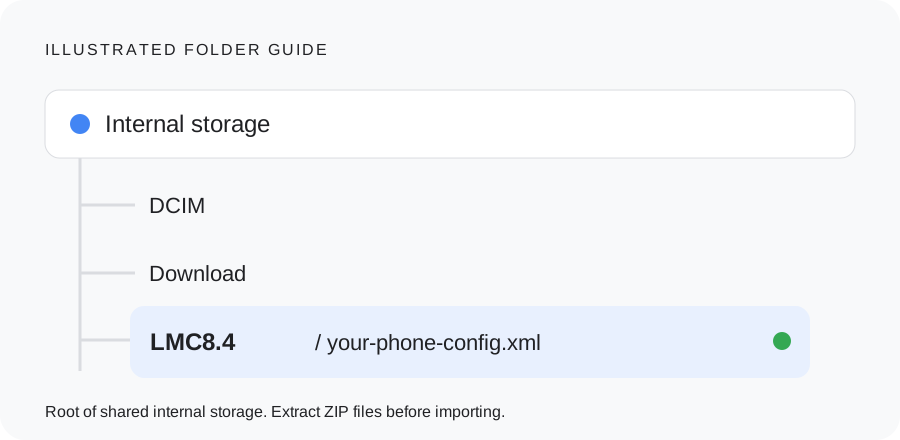
For the indexed LMC 8.4 R15 and R16+ configurations, put the extracted .xml file in /LMC8.4/ at the root of shared internal storage. Open the camera, double-tap the dark area near the shutter, choose the XML, and use the import or restore control.
Choose a file that matches the build
Use the XML catalog to match model and release. R15 has its own source index. The R16+ index warns that R15 files may work on newer builds but need testing. R18’s release notes accept previous configs; this does not validate every device-specific setting or every historical XML.
Load a config
- Export your current settings first, using the save/config option available in your build. Give the backup a name that includes your phone and release.
- Obtain a community XML from its cited source or a configured catalog destination. If supplied as a ZIP archive, extract it first; do not rename the archive to .xml.
- Create LMC8.4 in shared internal storage, beside DCIM and Download. Move the actual .xml file directly into it. Avoid a second nested LMC8.4 directory.
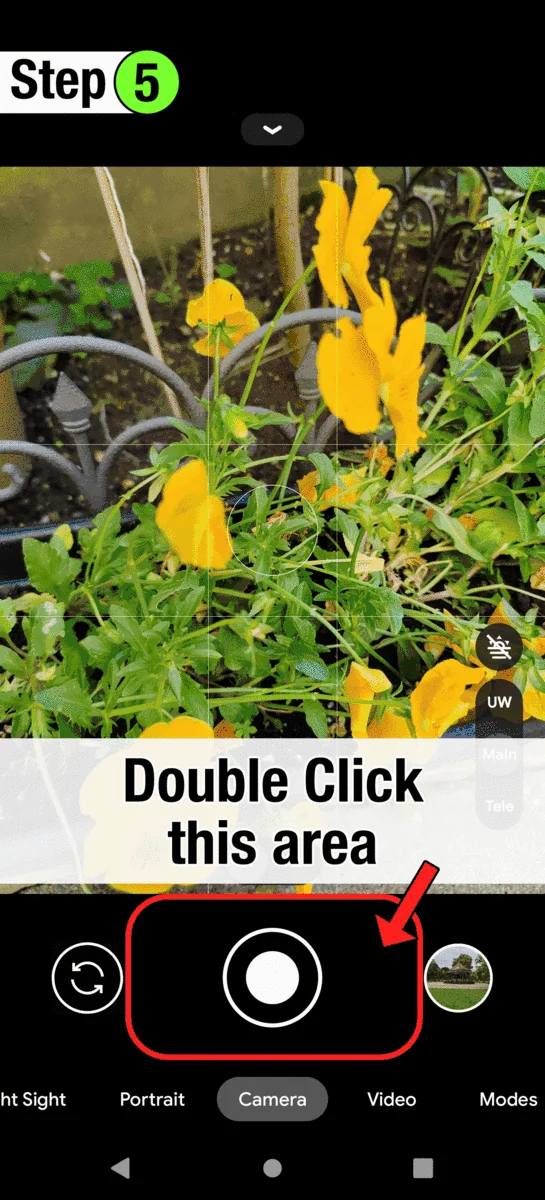
- Open LMC and double-tap the dark area around the shutter. Source examples are generic GCam instructions; exact placement and wording can vary.
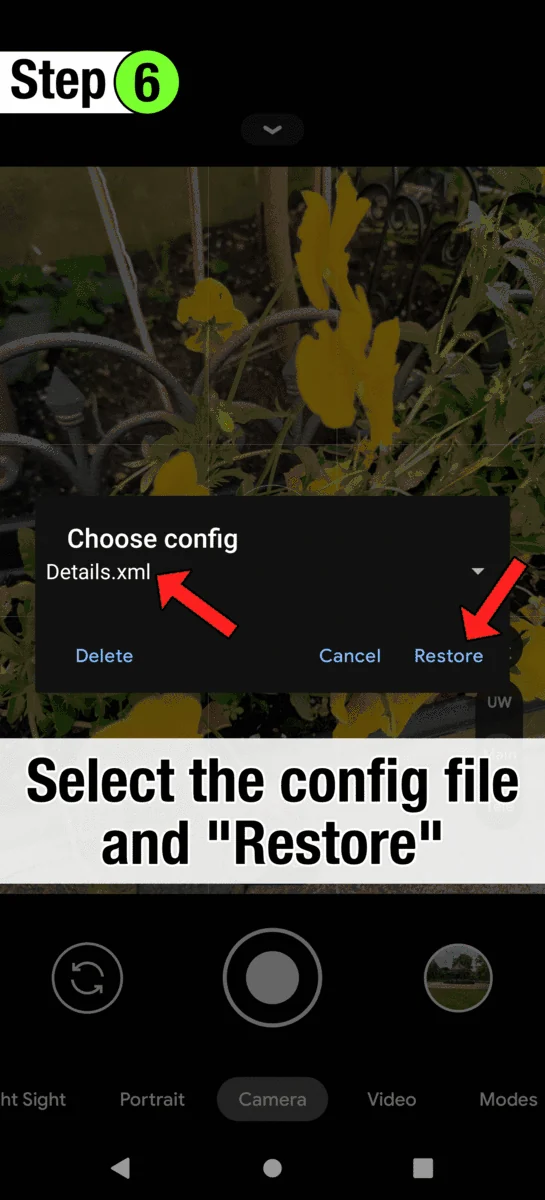
- Select the filename and tap Import or Restore. If necessary, follow the build’s instructions and repeat the restore. Reopen the app if the chosen configuration requires it.
- Test main camera, selfie, each auxiliary lens and video. Record the loaded filename yourself; the import list may not show which config is active.
Android storage permissions
Android 11 introduced scoped-storage restrictions. Some older GCam ports need special All files access to read shared XML folders. If LMC exposes that permission and cannot see the XML, review its entry under Android’s Special app access. Do not assume a photos-only permission grants access to an XML document.
Menu names and available permissions vary with Android, firmware and app target version. Grant broad storage access only if you trust the APK and need the feature. Saving a config from within LMC is a useful way to discover its actual directory.
Back up, restore and compare settings
Look for a save or XML configuration action in settings; the location differs between builds. Export with a short descriptive name and copy the result somewhere safe. To return to that setup, import the backup through the same chooser.
Compare presets using the same scene, lighting, lens and capture mode. A label such as DSLR, iPhone color or Leica expresses a requested look, not the sensor, optics or processing of those products. There are no verified comparative captures on this site.
If no files appear
Check the exact folder location, a real .xml extension, extraction of ZIPs and storage access. Save a temporary config in the app to reveal its directory. A wrong-release XML can fail even when it appears in the list; revert to the backup or reset only after exporting settings. See config-related crashes.
What an XML import looks like
These two frames come from the source’s generic GCam tutorial. They explain the double-tap and chooser sequence; they are not LMC screenshots, and their generic folder path is not the LMC directory instruction.
Before this screen
Put the extracted XML in /LMC8.4/ for the indexed R15 and R16+ builds. A ZIP is not an XML. Check access to shared storage if the list is empty.
After this screen
Record the filename, reopen the app if the profile requires it, and verify saved photos and each lens. If a crash began only after the import, return to your backup before testing another file.
Check the LMC folder →Generic tutorial source. No successful import or phone test by this site is implied.
Make the next step easy to verify
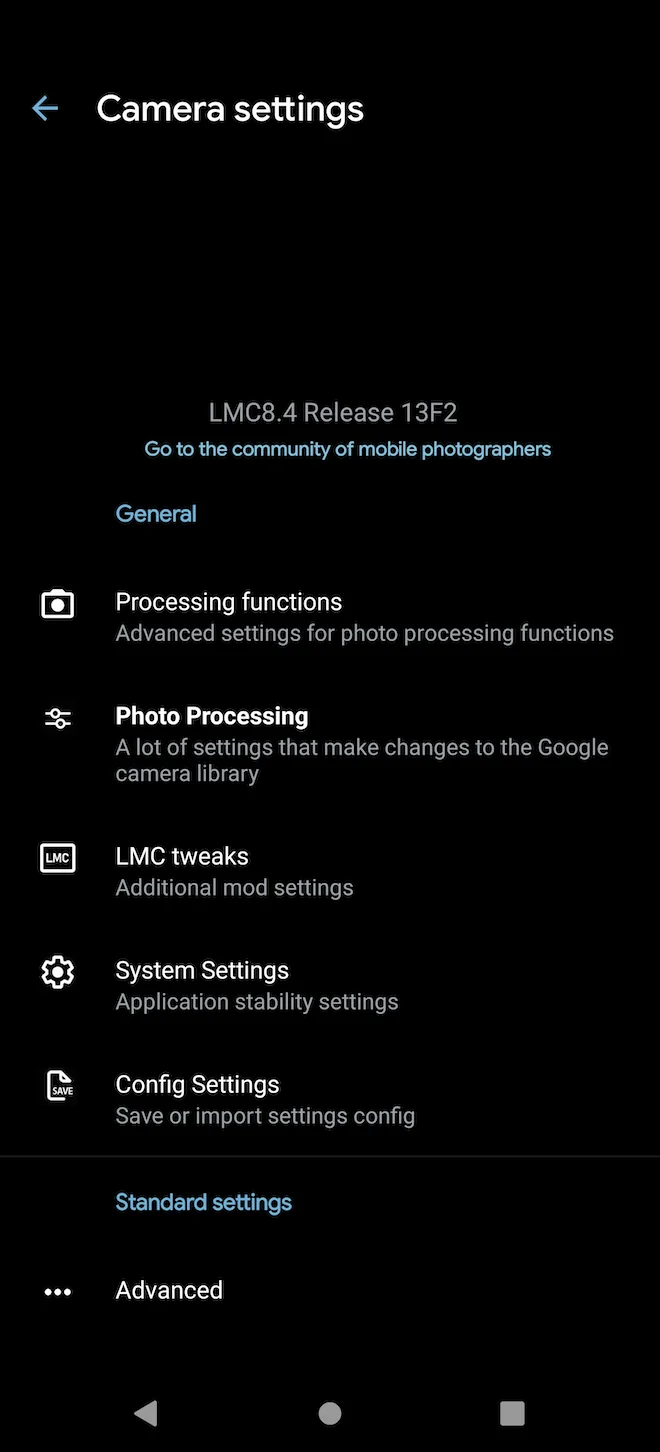
Export a backup you can recognize
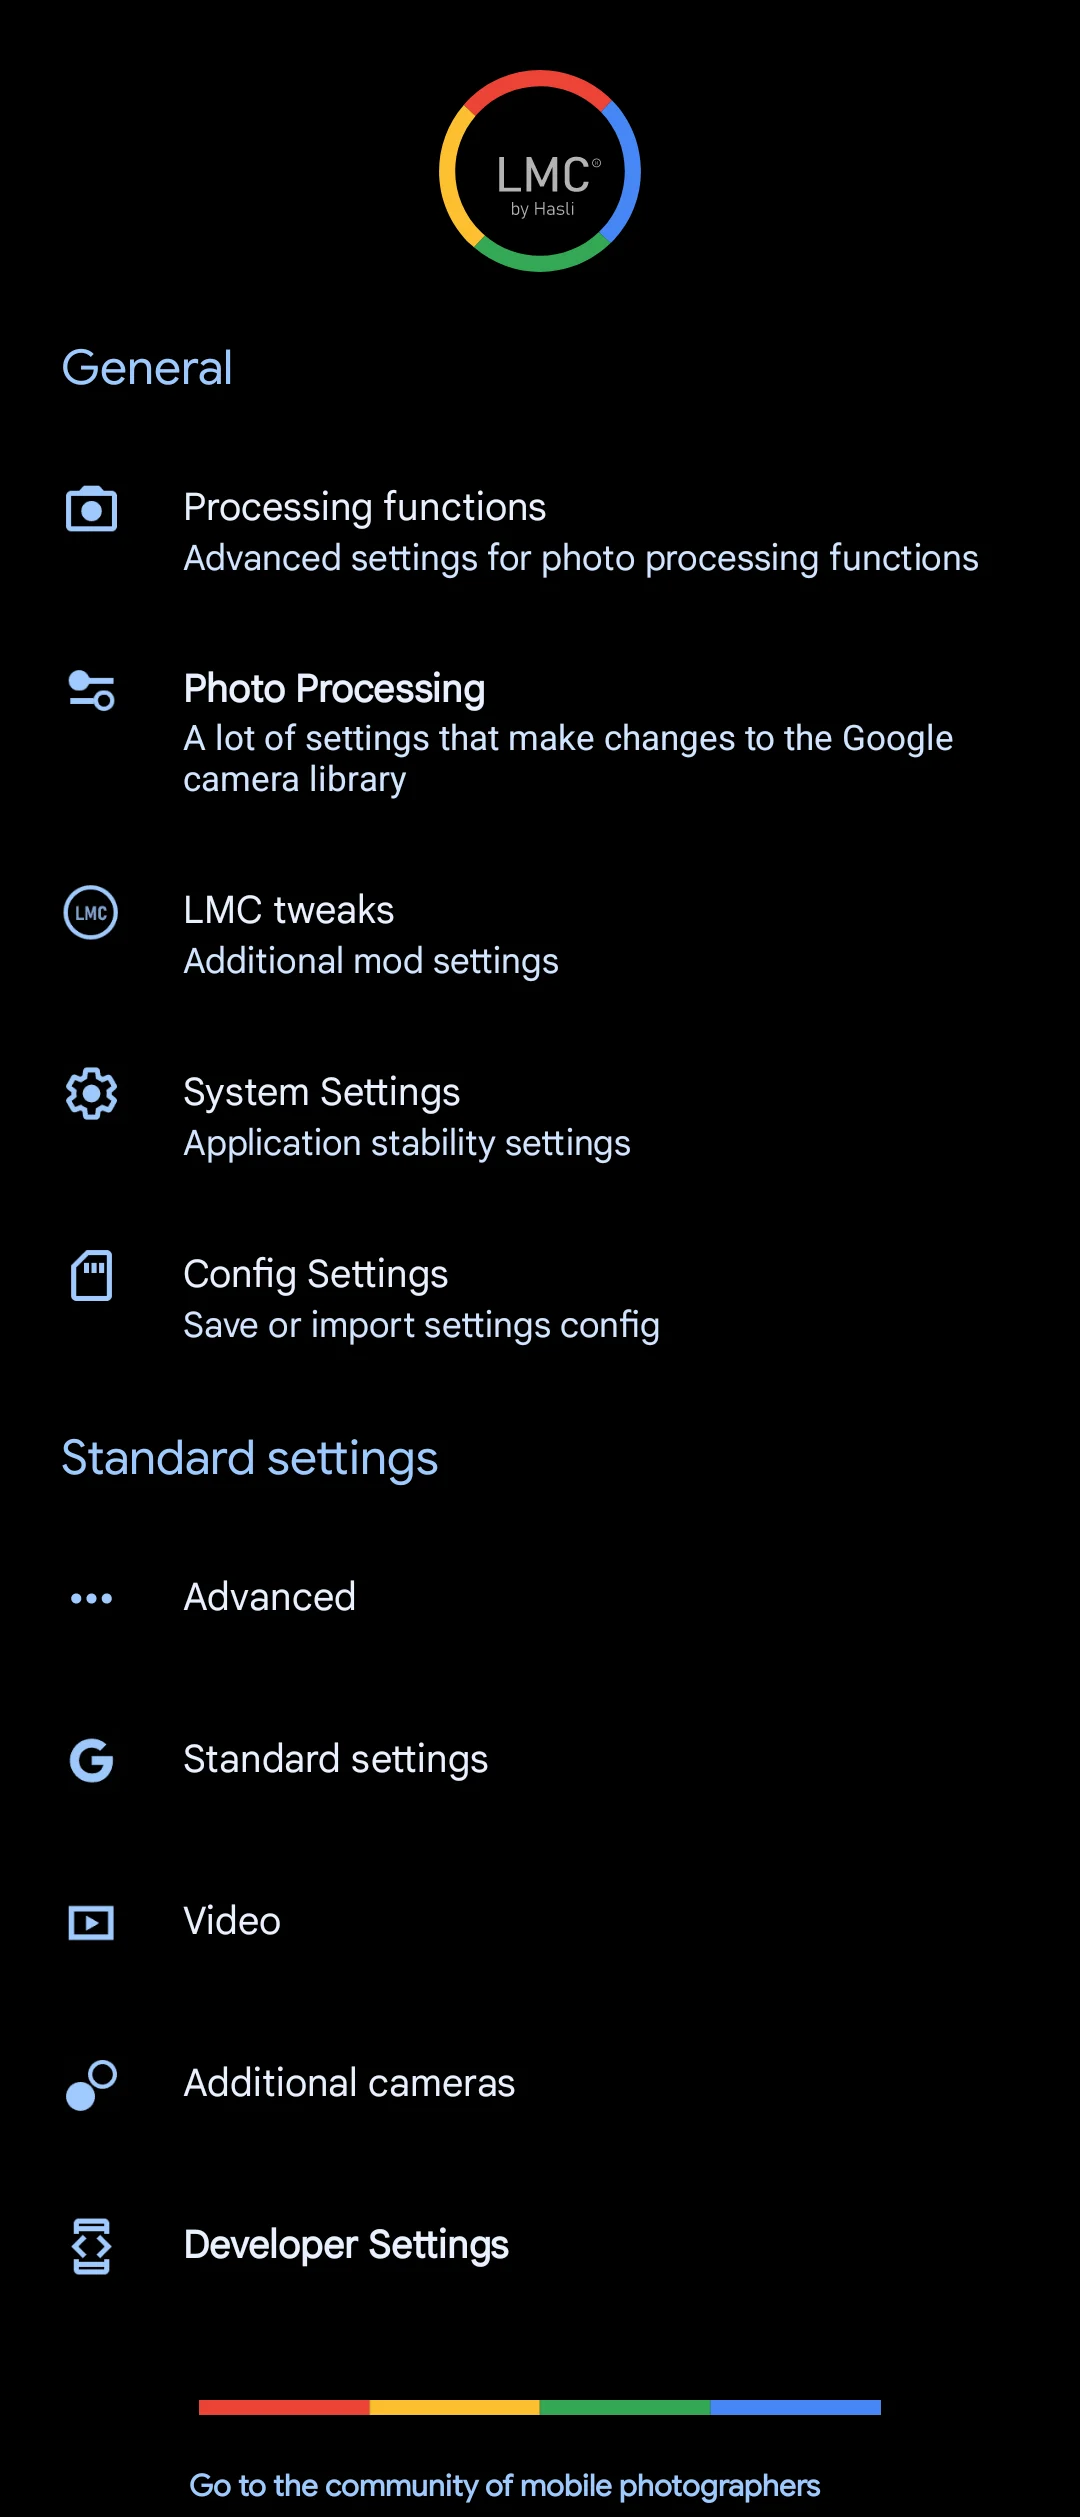
Look for Config Settings, Save settings or the equivalent action in your installed build. Save a short filename that identifies the phone and release, such as my-phone-r18-working.xml. That is a naming example, not a supplied config file.
Find the exported XML in your file manager and keep a separate copy. Saving from the app also helps you discover its actual config directory. If you cannot find the expected menu, consult the notes for the exact build rather than following a screenshot from another release blindly.
Confirm what changed after restore
A preset can alter camera IDs, color, noise or processing controls. Test the same lens/mode before and after it. The chooser may list available files without identifying the active one, so write down the filename you loaded.
Keep a simple setup record
Save these details with your backup. They make it possible to repeat a working setup or describe a problem accurately.
________________________
________________________
________________________
________________________
________________________
________________________
Copy this checklist into your own notes. This page does not submit or save your device information.